Troubleshooting NVIDIA GPU driver issues
Assumptions:
This is for NVIDIA GPUs, and does not cover other brands or other types of accelerator.
This covers installations and troubleshooting within Linux environments only.
Some examples cover either Red Hat Enterprise Linux or Ubuntu Linux, but open source alternatives should work the same.
As GPU acceleration is becoming important for more workloads, particularly for machine learning and deep learning use cases, we’re seeing ever greater adoption of these devices. The benefits of GPU acceleration when running frameworks like TensorFlow and PyTorch include the huge performance gains, but also the efficiency gains of using the optimal hardware for the job. However, in order to get the most out of the hardware, you also need the right software, which is where tools like IBM’s Watson Machine Learning Community Edition comes in, providing GPU accelerated versions of machine learning and deep learning tools free of charge. The most important bit of software though is the lowly Driver — that bit of code that allows your system to access and utilise the incredibly powerful hardware inside.

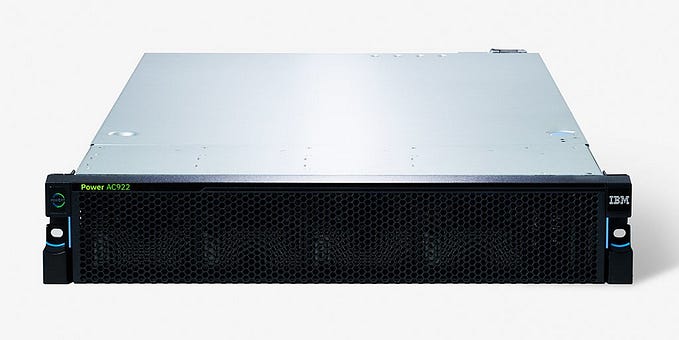
We’ve seen a few people report problems when installing their new systems that include NVIDIA Tesla enterprise grade GPU devices. Almost all of these are related to the driver installation, and so we’ve seen a few common problems. Below is a quick guide to help identify where a problem might lie, and how to fix it. In most cases I refer to a POWER9 processor based Power Systems AC922 server with NVIDIA Tesla V100 GPUs, but the problems are common to most NVIDIA Tesla GPUs, including the P100s in the S822LC for HPC (Minsky) systems based on POWER8 processors.

General recommendations
It is advisable to make sure that your system is up to date before installing any extra device drivers, or applications. This way you can benefit from the latest security patches and performance enhancements.
Update all of the installed packages on your system by running:
sudo yum update (Red Hat Enterprise Linux)
sudo apt-get update; sudo apt-get upgrade (Ubuntu)
To install the NVIDIA drivers you will also need the latest kernel-devel package installed to match your current kernel version:
sudo yum install kernel-devel (RHEL)
sudo apt-get install linux-headers-$(uname -r) (Ubuntu)
You will need to reboot the system after any kernel package update, in order to pick up the required changes. The system must be rebooted before attempting to install the GPU driver.
1. Do you have the right driver?
There are different drivers for different operating systems and GPU parts. It’s important to get the correct driver for your system to ensure compatibility. You can download the correct driver straight from the NVIDIA website at: https://www.nvidia.com/Download.
Once you’ve selected the correct part (Tesla | V-Series | Tesla V100 in our case) you need to choose the correct Operating System. Select the “Show all Operating Systems” option in the drop down to get the full list. On our hardware, for Red Hat Enterprise Linux 7.6-alt we would choose “Linux POWER LE RHEL7” or for Ubuntu 18.04 LTS we would go with “Linux POWER LE Ubuntu 18.04”.

You can then choose the Search option, and confirm that you have the correct driver for your system. You will also need to accept the terms and conditions that NVIDIA put in place.
Note: If you right click on the “Accept” link and choose “Copy Link Location” or “Copy link address” or similar, this will provide you with a direct link that you can use to wget the file directly onto your server.

The file you download will be an rpm (RHEL) or deb (Ubuntu) file, which can be installed as any other package. This will install a local repository, from which you can install the actual driver packages.
Once you have installed the right driver, you will need to reboot your system to pick up the changes. For machine learning or deep learning use cases you will also need to enable persistence mode to ensure best performance.
2. Does the nvidia-smi tool work correctly?
Once you have installed the driver and rebooted your system, the best way to check the health of your installation is by running the nvidia-smi command. This gives you a view of the GPUs present in your system, along with various metrics about how heavily they are being utilised and which processes are using them. There is also detail about the current driver and CUDA levels installed and whether persistence mode is enabled.

If the nvidia-smi command does not run at all or can’t be found, then it usually indicates that the driver has not been installed correctly on the system. I would recommend removing any installed driver versions and then rebooting the system and installing the latest drivers available. For details of how to do this, there are some good instructions for both RHEL and Ubuntu in the IBM Knowledge Center.
3. Are there nvidia-smi errors?
The nvidia-smi command can also show some errors, which can help us determine what the problem might be.
“ NVIDIA-SMI has failed because it couldn’t communicate with the NVIDIA driver”
This error is usually due to a problem with the installation of the driver. Most commonly we see this error when people have installed the driver but not yet rebooted the system, although it is also seen if other packages have been installed after the NVIDIA driver and before the system has been rebooted.
If a reboot of the system doesn’t correctly pick up the driver, then I would recommend removing all old driver versions, and then reinstalling the latest driver and rebooting the system immediately afterwards. For details of how to do this, there are some good instructions for both RHEL and Ubuntu in the IBM Knowledge Center.
“Failed to initialize NVML: Driver/library version mismatch”
This is the most common error we see, and is an indication that the NVIDIA driver kernel module has not been built against the same level of the Linux kernel as the one the system is running. The driver installation uses details from the kernel-devel package to build the driver correctly for the system. If this is at a different level to the kernel that is currently running then they will be incompatible.
To check if this is the problem, you can use the Dynamic Module Kernel Support framework (DKMS) to find the state of the NVIDIA driver kernel module:
sudo dkms status
This should list an NVIDIA module, and give the status of “installed”. If the status is listed as “added” or “built”, then you will need to reinstall the kernel module. First, you will need to remove the existing module, then install consistent levels of the kernel and kernel-devel packages. Once that’s done you can rebuild and install the kernel module.
Update your kernel and kernel-devel packages to the same latest level:
sudo yum install kernel-devel
sudo yum update kernel kernel-devel
If the kernel is updated to a newer version then you will need to reboot the system to pick up these changes. If not, then you can continue with the next steps. For these, the NVIDIA driver level is the driver release you are trying to install. The kernel level is the release of the Linux kernel running on your system. This can be found from the installed package name, or by running:
uname -a
In our case, the kernel version is currently 3.10.0–957.21.3.el7.ppc64le so you might need to look for a similar looking string.
sudo dkms remove nvidia/<nvidia driver level> — all
sudo dkms build nvidia/<nvidia driver level> -k <kernel level>
sudo dkms install nvidia/<nvidia driver level> -k <kernel level>
dkms status
The final dkms status command should now show you that the driver kernel module is installed for your current kernel version. You should now be able to run the nvidia-smi command and see all of your installed GPUs.
4. Is the NVIDIA Persistence daemon running?
For machine learning and deep learning workloads, it is recommended to run your GPUs with persistence mode switched on. This helps memory management on the GPUs with larger jobs, and improves performance. If you are seeing problems with these workloads check that the nvidia-persistenced daemon is enabled and started.
sudo systemctl status nvidia-persistenced.service

If this daemon is showing that it has been enabled, then it will restart every time the system boots up, whilst active means that it has been started and is currently running. If it is disabled or inactive, then you can run:
sudo systemctl start nvidia-persistenced.service
sudo systemctl enable nvidia-persistenced.service
You can also confirm that persistence is running through the output of the nvidia-smi command. For each GPU installed there is a field showing if persistence mode (Persistence-M) is on or off.

5. Are there hardware problems?
If the software side of things appears to be okay, it’s worth checking that the GPU hardware itself is not causing your problems. You can check the standard Linux logging system for messages related to the NVIDIA kernel module, labelled with NVRM:
sudo dmesg | grep NVRM
You can also check that the GPUs are visible to the system itself, by checking that they appear as PCI devices. You might need to install the pciutils package on your system to run the following command:
sudo lspci | grep -i NVIDIA
6. Do you have memory problems?
There is a known issue on POWER9 processor based servers running the latest version of Red Hat Enterprise Linux 7 (7.6) alternative architectures release. The newer kernel version in use includes an auto-onlining feature for memory within the system. In virtualised environments this is a great thing, as it means that you can dynamically add memory resources to a running virtual machine and it can automatically online and use that new capacity.
Unfortunately, the High Bandwidth Memory on the NVIDIA Tesla GPUs is also seen by the Operating System, and so the Red Hat kernel attempts to claim that memory space immediately — making it unavailable for GPU workloads.
To disable this, you need to change the UDev rule that enables auto-onlining of memory. This involves commenting out the relevant lines in the file:
/etc/udev/rules.d/40-redhat.rules
Details are available in the IBM KnowledgeCenter, but you essentially need to comment out the entire section covering the memory hot add capability. A reboot is then required to pick up these changes. My personal recommendation would be to make these changes before installing the latest NVIDIA driver. You can then reboot the system and pick up both changes at once.
Summary
There are a few common problems that appear when installing the latest drivers for NVIDIA GPUs, but most of them are easy to work around. Here is my simple flowchart to help troubleshoot the common problems that we’ve seen:

One more thing…
There is one other potential reason that your deep learning or machine learning workloads are not making the best use of the GPUs installed in your system, and that is the frameworks and tooling that you are using. The common deep learning frameworks like Tensorflow and PyTorch are available in both GPU accelerated versions, and CPU only versions. So it is possible to install the wrong version, and be restricted to only using the system CPUs rather than the NVIDIA GPUs installed in your system.
Also, popular machine learning algorithms like those in the SciKit Learn python package are not GPU accelerated. So running workloads involving things like linear or logistic regression, or extensive use of xgboost will not make use of any GPUs installed in a system.
To get the most out of your GPU accelerators, you will need to run the right software that has been created to make the most of them. For the deep learning frameworks, I would recommend using Watson Machine Learning Community Edition (WML CE). This is a pre-compiled set of the most used open source tooling, optimised to run on GPUs where available. It includes the latest versions of things like TensorFlow, PyTorch, and Caffe, as well as managing all dependencies through the Anaconda Python package and environment manager.

For machine learning workloads, WML CE also includes the SnapML packages. This provides GPU accelerated versions of the most common machine learning algorithms to boost performance. It even includes a SciKit Learn style python API so can act as a drop in replacement for sklearn, with no changes to existing code. This can give up to a 46x performance boost over CPU alone.
Another option for accelerating machine learning tasks using GPUs is the open source RAPIDS suite of software libraries originally developed by NVIDIA. This also adds GPU acceleration to common machine learning jobs to increase performance and efficiency.


